As it is another lovely sunny day here in Brighton today I thought I'd post the photos from last week incase anyone was thinking of a trip to the beach today!
All you need to take with you is a couple of not too thick paintbrushes, a box of paints , could be watercolours or gouache, some paper or a little sketch pad, A pot to put some water in and perhaps some water, although obviously there is also a ready supply of this at the beach but you may want to avoid wet feet in the winter!
M just got on with it herself mainly, she's enjoying mixing colours at the moment. We put stones on the paper to stop them blowing away. She painted stones too see here and here for more pebble painting and drawing ideas and have a look at my at the beach board on raindrops and paint pots Pinterest
M did some drawing too....always a good idea to bring some felt tips to the beach.
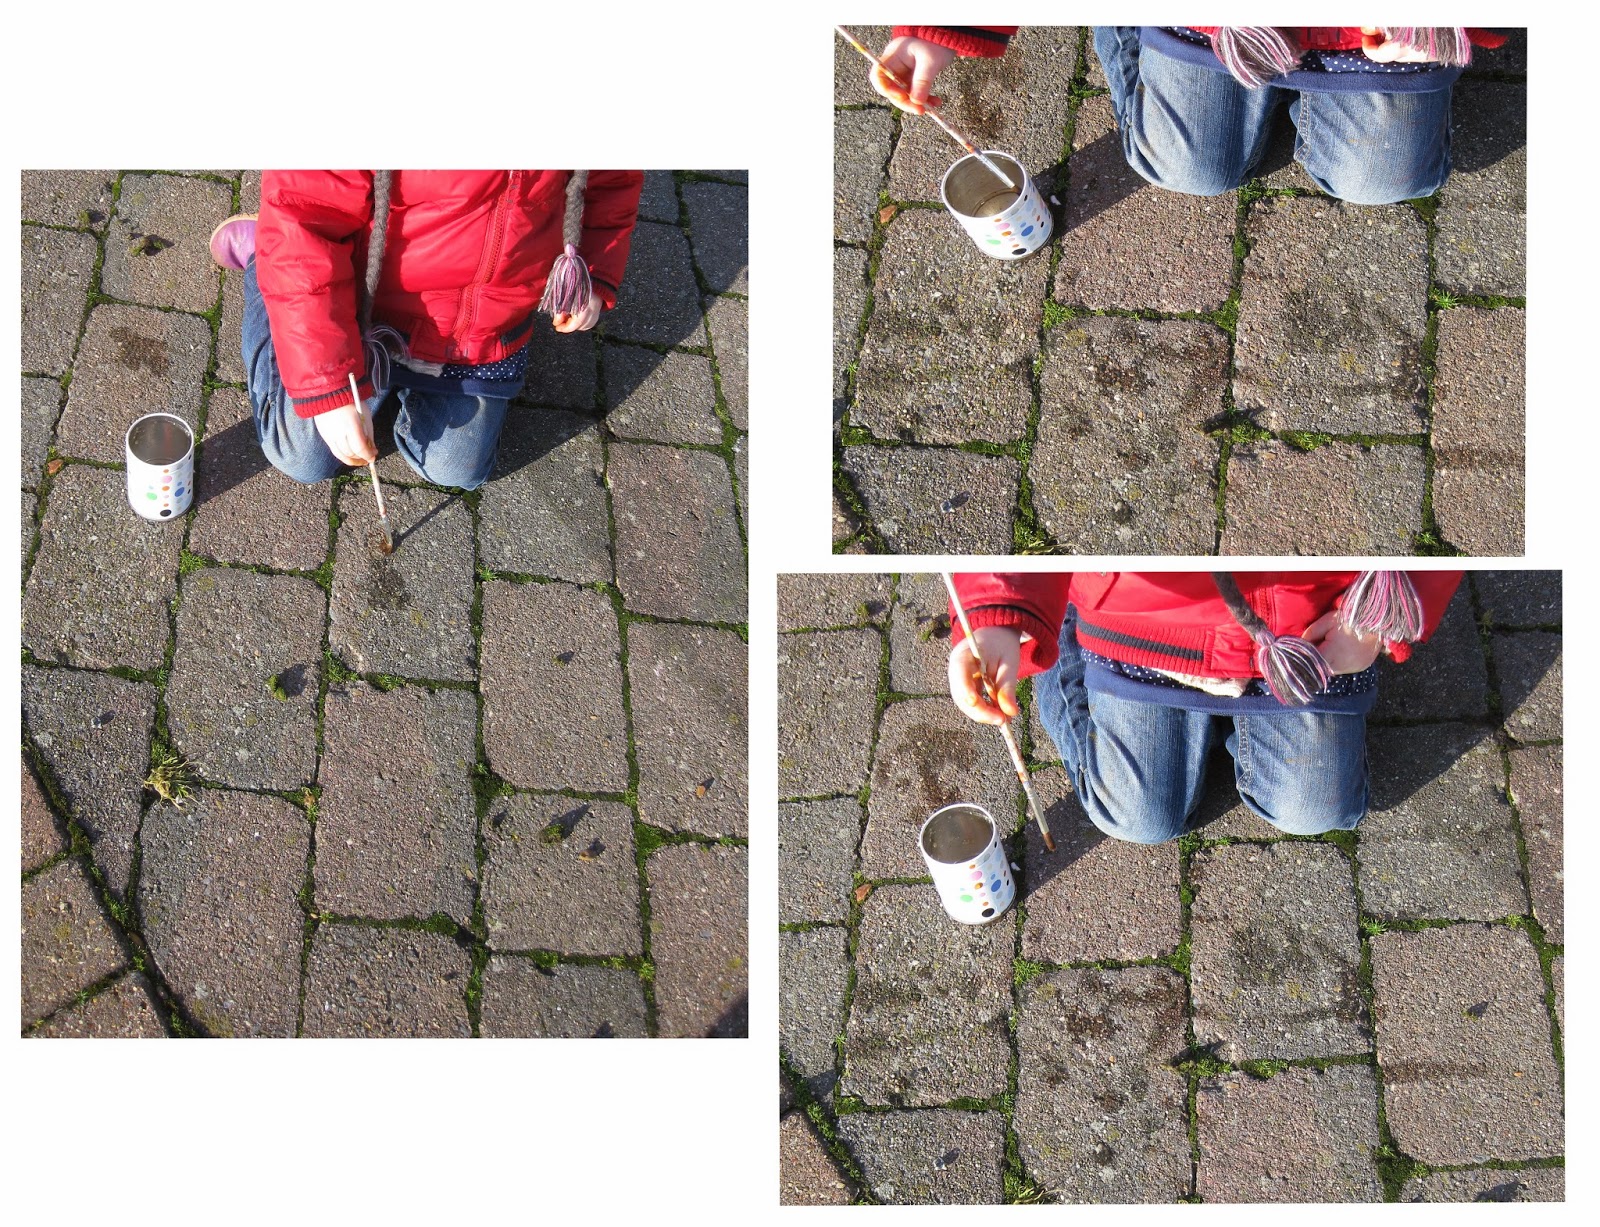
Lastly we did some painting with just water - so no mess at all! this works really well on paving slabs too.
Nothing complicated, just a few ideas to try. We had a hot chocolate afterwards to warm up!
Don't forget to like the facebook page, follow on twitter and pinterest and to share any drawing, painting and making you do at the beach....or anywhere else!
drawing and making for babies, toddlers, preschoolers, older children (and grown-ups too!)
Monday, 20 January 2014
Tuesday, 14 January 2014
printing and painting
Just a quite share of couple of photos of some things we've done recently. I'll get a full post up about at least one of the activities in the next few days.
A rainy Tuesdsay spent painting, printing and stamping on a big piece of paper on the kitchen floor
(followed by a bath!)
A sunny Tuesday spent at the beach using some watercolours to mix colours and paint pictures and pebbles.
(followed by a hot chocolate!)
A rainy Tuesdsay spent painting, printing and stamping on a big piece of paper on the kitchen floor
(followed by a bath!)
A sunny Tuesday spent at the beach using some watercolours to mix colours and paint pictures and pebbles.
(followed by a hot chocolate!)
Tuesday, 10 December 2013
christmas card time!
M's first go at printing, quite surprised how successful they were and it was also significantly less stressful than trying to teach a class of year 9s who think they know everything already !!
We used polystyrene printing sheets which are really the easiest was to do printing with little ones (and sometimes big ones too!) we drew into the sheets using cocktail sticks and biro and also pressed christmas themes biscuit cutters in.
You can buy black printing ink from most art shops and rollers too. seawhite is a great art supplier near brighton. Printing ink is water based and does wash out but it is sticky and messy! It also takes at least 24 hours to dry. Computer paper or thin card is ideal for printing onto, sugar paper doesn't work so well, newspaper and magazines are also good.
Roll out the ink onto a flat surface, a sheet of acetate works well or perspex, or you can buy printing trays. Roll it not too thick or too thin, it should make a sticky sound, if it doesn't it's too thick. Have three areas - One for rolling the ink, one for rolling the ink onto the polystyrene and one for printing in onto paper. You will need two rollers, and ink one and a clean one.
Once you've rolled the ink out, roll it onto your piece of polystyrene, in both directions so it is all covered, turn the polystyrene over onto your paper or card and press down firmly, turn it over so the paper is on the top then use your clean roller to roll in both directions and carefully peel the paper off.
It sounds complicate but it really isn't, it sometimes takes a bit of practice to get a good print but children of all ages love it!
I drew out a star and a tree and M filled them with patterns by pressing in pen lids, etc.
We tried out creating some repeat patterns - once a textile designer always a textile designer!
I cut and folded the card first for M to print onto which worked well.
Labels:
Christmas cards,
preschooler,
printmaking
Monday, 28 October 2013
the superest duperest playground!
Inspired by the big draw event we went to last week drawing futuropolis I re-created it in our kitchen. Mati loves making and drawing playgrounds at the moment, creating exciting climbing frames, twisty slides and not forgetting the all important cafe. After spending the first part of the morning using building blocks to make a playground for her Play Mobil people in her room we moved downstairs to the kitchen. I taped two lengths of lining paper to the floor and we made another playground out of blocks to give us some ideas.
I found a selection of different geometric shaped objects to draw round , saucepan lids, baking trays etc to create our playground drawing. Drawing round objects is great to build confidence with drawing for children or adults, it allows you to create images by putting shapes together (see my fun in the kitchen post) It is also good for developing coordination and fine motor skills. Mati was really enthusiastic about suggesting different things we could draw round.
We built up our playground, both suggesting ideas for what to include. Mati suggested using pipe cleaners to make a twisty slide that we could draw round and she got very involved in this task.
Once we had the basic shapes we began to add our own drawings (water fountains) patterns and colour. We used felt tips for drawing round the objects and wax crayons and paint to add pattern and colour, Mati flicked paint to make rain obviously realistic about the British weather! She also remembered that at the De La Warr Pavilion people also made 3D objects out of paper to add to the map of futuropolis so we did the same thing.
The final (so far!) touch was some collage using tin foil and scraps of holographic card, Mati used these to create an icy cold river and an ice skating rink.
So then all that was needed was some children to play in the park.....
This really kept Mati entertained all day and I've left it taped to the floor so we may even continue to add to it tomorrow. It would be a good activity for friends or siblings of different ages to do together. Even the baby was able to join in by doing a bit of scribbling, as it was a collaborative effort no one minded her drawing over out drawings. It is a good exercise for learning to share and work together.
Other ideas for large scale collaborative drawings - drawing a town or a city you know, a city for the future, an machine/invention, a house/houses
I found a selection of different geometric shaped objects to draw round , saucepan lids, baking trays etc to create our playground drawing. Drawing round objects is great to build confidence with drawing for children or adults, it allows you to create images by putting shapes together (see my fun in the kitchen post) It is also good for developing coordination and fine motor skills. Mati was really enthusiastic about suggesting different things we could draw round.
We built up our playground, both suggesting ideas for what to include. Mati suggested using pipe cleaners to make a twisty slide that we could draw round and she got very involved in this task.
Once we had the basic shapes we began to add our own drawings (water fountains) patterns and colour. We used felt tips for drawing round the objects and wax crayons and paint to add pattern and colour, Mati flicked paint to make rain obviously realistic about the British weather! She also remembered that at the De La Warr Pavilion people also made 3D objects out of paper to add to the map of futuropolis so we did the same thing.
The final (so far!) touch was some collage using tin foil and scraps of holographic card, Mati used these to create an icy cold river and an ice skating rink.
So then all that was needed was some children to play in the park.....
Other ideas for large scale collaborative drawings - drawing a town or a city you know, a city for the future, an machine/invention, a house/houses
Sunday, 20 October 2013
Futuropolis
Today we went to a Big Draw event at the De la warr pavilion in bexhill . Today was part 1 of a 2 part event - Futuropolis During half term a 3D futuristic prototype city will be built and visitors will be able to draw it and imagine what a city of the future might look like. Today we were helping to draw a map of a futuristic city. Several pieces of paper had been laid out and taped down to cover the floor of a large room, a river had been painted on it but the rest was up to the public! Here are some photos of the section we worked on which was a futuristic park! Mati loved it and I have got lots of ideas for similar projects to try out at home.
We are hoping to go to in half term and help to develop the 3D futuropolis! There is a very nice cafe there too and it's right on the beach - lots of space for little ones to run around outside and child friendly inside too. There are lots of other brilliant looking Big Draw events on all over the country for the whole of October too.
Tuesday, 15 October 2013
Fun in the kitchen!
I can't believe I've never thought of doing this before - would go down really well with teenagers at school too, a good way to reduce the "fear" of drawing and introduce colour, pattern and negative space. Mati loved doing this and came up with lots of her own ideas of objects to draw round. I made sure I asked her permission before I drew over any of her shapes and she asked me if she could draw over mine! I think we will come back to this to add more colour and pattern, areas of collage would be good too. could get quite carried away with this (...or more carried away may be?!)
I got the idea from Annie's lovely blog.
http://anniebrundrit.blogspot.co.uk
Friday, 4 October 2013
A drawingpaintingstickingmaking place
I haven't posted for ages, mainly due to being busy moving house with two small children. Now we finally have some space I have been able to make a proper area for mati to make stuff in. (I'm hoping an area for me to make stuff in will follow shortly!) I was inspired by my slightly out of control pinterest addiction! So here it is....
I started by measuring the whole area I wanted to use and drawing out a plan, before we went to Ikea. Normally i just go to Ikea grab stuff that looks useful and try and make it fit in the house later!!
We already had the table which is from the the Great Little Trading Company
It is a really useful desk - I can't seem to find it on their website now but it is very similar to this desk
infact this one may be more useful with the trays but with a 9 month old on the scene I wanted a box underneath the desk to keep things away from little hands!
I used the system of hanging rails, hooks and pots in our old flat for everything from storing cuttlery, to make up, to sewing stuff! It is all part of the Ikea Bygel system which is really reasonable priced too. The rails are only £2 and the plastic pots are 60p. I also used a wire basket for bigger items such as paint boxes and a few hooks are always useful (£1 for 10!!) We had a spare rail already and I didn't buy enough pots or wire baskets to fill it but I will be doing that - you can never have too much storage!!
I bought a small white shelf and bright red brackets and lots of these brilliant plastic boxes. I also had a couple of small card board suitcases from the Tiger Store in Brighton which is amazing - and I am not exaggerating!
Mati had requested a Gallery after an episode of something special and probably after seeing her Uncle Daniel's exhibition last year (www.asinglehumanbeing.co.uk - shameless plug for his work here!) So I bought a few cheap picture frames to exhibit her work in.
Before I put any of the rails etc up I painted the whole wall with black board paint. The art are is at the end of our kitchen/dining area because I wanted somewhere downstairs where mati can get on with something while the baby is having a "nap" (she doesn't nap) I really like the effect though and there is plenty of space to write shopping lists, reminders etc on too. I've found the B&Q chalk board paint is the easiest to apply and it's thicker than some of the others. It also comes in pink and blue. Don't bother with the magnetic chalk board paint - we tried it at our last flat and after 4 coats it was still barely magnetic!
I bought a magnetic white board too and some dry wipe markers just for another surface to draw on and also because we have a built in fridge freezer so there is no where for the obligatory magnetic letters and numbers to go.
Lastly I had planned to buy this wire with clips to display mati's drawings and paintings on but they were out of stock so it will have to wait till my next trip.
It seems to have been a success so far and it's great knowing where everything thing is. I've used the hanging pots for all sorts of materials, pens, pencils, sequins, paintbrushes etc. The plastic pots are good for smaller things like crayons and also small pieces of collage materials. In one suitcase I've put bits for one off projetcs like blank badges, wooden spoons, empty toilet rolls and in the other is tissue paper and bigger pieces of scrap paper for collage.
Watch this space for (hopefully) lots of exciting creations!
I started by measuring the whole area I wanted to use and drawing out a plan, before we went to Ikea. Normally i just go to Ikea grab stuff that looks useful and try and make it fit in the house later!!
We already had the table which is from the the Great Little Trading Company
It is a really useful desk - I can't seem to find it on their website now but it is very similar to this desk
infact this one may be more useful with the trays but with a 9 month old on the scene I wanted a box underneath the desk to keep things away from little hands!
I used the system of hanging rails, hooks and pots in our old flat for everything from storing cuttlery, to make up, to sewing stuff! It is all part of the Ikea Bygel system which is really reasonable priced too. The rails are only £2 and the plastic pots are 60p. I also used a wire basket for bigger items such as paint boxes and a few hooks are always useful (£1 for 10!!) We had a spare rail already and I didn't buy enough pots or wire baskets to fill it but I will be doing that - you can never have too much storage!!
I bought a small white shelf and bright red brackets and lots of these brilliant plastic boxes. I also had a couple of small card board suitcases from the Tiger Store in Brighton which is amazing - and I am not exaggerating!
Mati had requested a Gallery after an episode of something special and probably after seeing her Uncle Daniel's exhibition last year (www.asinglehumanbeing.co.uk - shameless plug for his work here!) So I bought a few cheap picture frames to exhibit her work in.
Before I put any of the rails etc up I painted the whole wall with black board paint. The art are is at the end of our kitchen/dining area because I wanted somewhere downstairs where mati can get on with something while the baby is having a "nap" (she doesn't nap) I really like the effect though and there is plenty of space to write shopping lists, reminders etc on too. I've found the B&Q chalk board paint is the easiest to apply and it's thicker than some of the others. It also comes in pink and blue. Don't bother with the magnetic chalk board paint - we tried it at our last flat and after 4 coats it was still barely magnetic!
I bought a magnetic white board too and some dry wipe markers just for another surface to draw on and also because we have a built in fridge freezer so there is no where for the obligatory magnetic letters and numbers to go.
Lastly I had planned to buy this wire with clips to display mati's drawings and paintings on but they were out of stock so it will have to wait till my next trip.
It seems to have been a success so far and it's great knowing where everything thing is. I've used the hanging pots for all sorts of materials, pens, pencils, sequins, paintbrushes etc. The plastic pots are good for smaller things like crayons and also small pieces of collage materials. In one suitcase I've put bits for one off projetcs like blank badges, wooden spoons, empty toilet rolls and in the other is tissue paper and bigger pieces of scrap paper for collage.
Watch this space for (hopefully) lots of exciting creations!
Subscribe to:
Posts (Atom)