Alphabet bunting

Alphabet bunting
what we did last summer....

Thursday 28 March 2013

Rainy Day Jars


Since it looks like springs isn't here after all I thought it was about time I revealed what was in the rainy day jars I made.

I found loads of ideas on Pinterest - you can have a look at my rainy day board to see all the ideas I've been collecting and the ones I didn't use.

Here is what I included in my rainy day jars....
 
I made 5 jars up at the same time which is probably the most cost effective way to make them. I gave four as gifts and kept one for mati. You can then buy things in bulk and divide them up. I also saved things like paper bags, old envelopes etc.
 
I made the J-cloth road. There are loads of variations of this, electrical tape, old jeans, card/paper etc. but I was looking for something thin enough to roll up and put in the jar.
 
I also made the pirate bandana and eye patch. I had some gingham fabric left over from another project and found some online tutorials to work out what size to make it (a sqaure 50cmx50cm is about right) The eye patch is just cut out from some black linen trousers I was about to sent to recycling with string to tie it round your head.
 
I made some "what to do on a rainy day" cards to go with the jar to give some ideas of how to use all the things inside. I also thought the child could then choose an activity.


I also printed out some songs onto cards....
 
 
So far the Jars have been well recieved as birthday presents. They were for 3 year olds but I think they would be fine up to 4 year old probably and then you might need to start thinking of some different things to go into them. I think they would be ok for under 3s too minus the beads probably.
 
Here is what the final product looked like......it was quite tricky getting everything into the jar! I think perhaps a bigger one would have been better or you could use a tin, a bag or a box.


 I'd love to hear what ideas you have of things to put in a rainy day jar - since it looks like there are going to be quite a few rainy days to get through before we can get the paddling pool out again!


Wednesday 27 March 2013

Eggsellent Easter clay tiles and decorations

I spotted these on Pinterest when I was searching for ideas for things to make for Easter and then Mati got some air drying clay for her birthday and she was desperate to make something so this is the result......


hopefully you can tell which one was made by the 3 year old and which one by the 33 year old?!

....and here is how I made them.....


First I cut out an Easter egg template. I just did this free hand but there are plenty on line
I rolled out the clay using two pieces of plastic bread as guides and an olive jar as a rolling pin! The guides are useful to ensure an even thickness, you probably don't want it much thinner than 0.5cm or it will crack when it dries, 0.5-1cm is ideal. A couple of pieces of wood is ideal but as you can see plastic toast will do! Once the clay is rolled out draw round the template with a pencil or old pen but don't actually cut it out.

Now the fun bit.....


There are three ways to add pattern and decoration to a clay tile. Pressing/drawing into it, Building up onto it and cutting out. You can use almost anything to press into the clay to create patterns. The pasta bows worked really well and tin foil created a nice texture. Mati was really interested in what marks the different objects made and came up with some ideas of her own of things to use. She especially enjoyed drawing into the clay with a cocktail stick. You don't want to press things in too hard so they get stuck! There are loads more things you could use. I'd love to hear and see anything that works especially well if you give this a go. I thought magnetic letters could be good.


To build up pattern onto the tile you need to scratch (a few lines in different directions) into the surface of the shape you are sticking onto the clay and into the tile where you want to stick it. Then apply some water to both surfaces and press the shape firmly onto the tile. You need to then smooth the join down using your finger or the end of a spoon or similar.

Too much water will make the clay unstable and crumble or break when it dries. Children of all ages love the feel of clay mixed with water so just put a very small amount of water in a cup to use and then let them play with clay and water after you've finished making the tiles!

We just rolled up small balls which Mati was able to do. She also cut out and moulded some more random shapes to stick to the tile. You could roll out some more clay - or use some of the clay round the tile and cut shapes out from it to stick down.


Once the decoration was finished I made a hole in the top of each tile using an old Biro and cut the egg shape out using a sharp knife. We didn't do any cutting out but you could cut shapes out using a sharpish knife. The advantage of cutting the egg shape out after the decoration is done is that it keeps the edges nice and sharp and the pattern tends to continue right to the edge of the egg which looks good.

Every teacher knows some children will finish the task quicker than others...so here is the extension task!


These are egg decorations for hanging up on an Easter tree or around the house. They are smaller and a bit thinner than the tiles (but still no thinner than 0.5cm) Again I cut out a template and after rolling out the clay drew round it four times. We decorated the tiles and cut them out. Then I made holes in them using a cocktail stick to put ribbon through to hang them up.

We left the tiles and decorations to dry. They have taken longer to dry than I thought they would, the decorations which are thinner are dry now (48 hours) the tiles look like they will be dry tomorrow ( nearly 3 days) Once they are dry my plan is to paint them. A Good Friday activity I think...! I'll show you how that goes.

There are lots of great air drying clay ideas - you can see what I've found so far on Pinterest as well as what else I've been looking at and go ahead and Pin stuff from here if you like it!

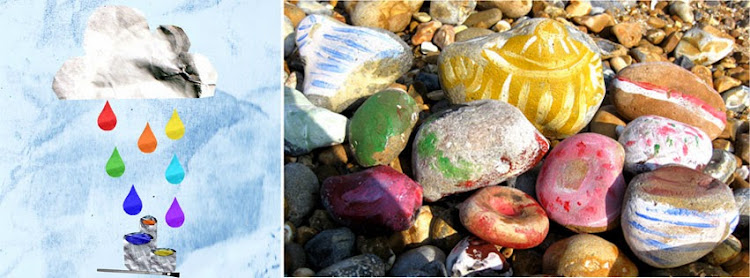
Painting the tiles.....


and here is how I did it.....

I used acrylic paint, the advatages of acrylic is that it gives good coverage, it creates bright colours and it isn't easily absorbed by the clay - so you don't need to use several layers. It is also shiney when it dries so it has a glazed look. Acrylic paints also dry quickly. If you don't mix the colours and use them straight from the tube they can be a bit harsh. It can also be tricky to get out of clothes - you need to soak them straight away. Ready mix paints would work well too or water colours for a much more sublte effect.

I gave my tiles a layer of white paint first to make the colour I applied after to be brighter.

I added colour to different parts of the tile and used techniques like dipping the end of the brush into the paint to creat dots etc.

With the small tile I mixed blue, yellow and while to create a duck egg blue and built up thin layers of it onto the tile making them gradually lighter by adding a bit more white each time.

For mati's tile I put a bit of each colour paint onto a plate and let her mix and apply the colour. An art teacher's pet hate is students using colours straight from the tube and having to look at 30 paintings with exactly the same colours in each....so putting paint onto a plate/palette encourages children to mix colours and to see what happens when you mix blue and yellow etc. I tried to help mati not apply to too thickly so you could still see the marks she made in the tiles and also not to add too much water so the tiles didn't go soggy again.


We also added some sequins after with PVA glue. Another idea would be to add them when the clay is wet, you could also add buttons and beads.

Easter is over and the chocolate has probably all been eater but you could adapt this project for loads of other events; stars at christmas, hearts for valentines day, leaf shapes in autum, or just random shapes or traditional square tiles.

Tuesday 26 March 2013

Clay Easter egg tiles

Mati got some air drying clay for her birthday so this morning's project was clay Easter egg tiles. I took lots of photos of all the different stages so there will be a tutorial to follow later today or tomorrow.

Thursday 21 March 2013

5...4...3...2...1

The count down is on to mati's space themed birthday party....


Cardboard Rocket photo booth

Monday 18 March 2013

Space rocket skittles

Getting ready for Mati's space themed birthday party making some rocket skittles - more space themed projects to follow!

Friday 15 March 2013

Frootiful Flutterflies


Inspired by a charlie and lola's butterfly gallery on the Cbeebies website this is a really simple activity. Everyone remembers making butterfly prints as children!
 

We had some sheets of thin card but the inside of cereal boxes would work well or cartrige or sugar paper. It would also be fine on printer paper but may be too flimsy to hang on the ceiling.
 
Paint on one side of the card/paper and then fold it over and press down and rub to create a mirror image on the other side. You can use hand prints, finger painting, brush strokes, paint flicks etc. Any paint will do, we used childrens finger paint which is quite thin and creates a nice effect when overlayed but you could create brighter colours using a ready mix paint or acrylic if you are feeling brave and wearing old clothes!!...I couldn't resist adding some glue and glitter...I never seem to be able to resist the glitter! You could add collage using cut out or foam shapes or stickers. Mati's butterflies have had glo in the dark stars added to them in the last few weeks!
 
I didn't cut out the butterfly sheets until after we'd done the painting so I could choose the best part of the painting to use.
 
We then stapled them (using a staple gun) to Mati's bedroom ceiling which had the added bonus of her being very keen to go to bed for the next 2 or 3 nights!
 
A nice activity to go with reading The Very Hungry Catipillar


Thursday 14 March 2013

Rainy Day Jars

I've been busy making these today...will post in more detail later as I'm planning on using them for birthday presents and I want to keep the contents a suprise!

There are holes in the sky where the rain gets in, the holes are small and that's why rain is thin.

Tuesday 12 March 2013

Future posts

Here are a few of the other things me and mati have made -
I'll post about them in more detail with more photos soon


Lost In Spaaaaaaace!
A Pumpkin is for life not just for Halloween!
Frootiful Flutterflies
I scream, You scream, We all scream for ice-cream!


.


First Project

Card Alphabet Bunting

This was the first thing I made with mati....well technically not with her as it was before she was born when I was about 38 weeks pregnant!

Some one told us that babies really like shiney things and black and white images and patterns are the first things they can see so we bought a selection of card and I printed out some of my squigly patterns I use in my textile designs.(www.notnicelaura.co.uk) I cut out the letters of the alphabet, hole punched them and threaded them onto ribbon. I drew the letters freehand - one of the skills you learn when you are an art teacher, but you could print out letters from word - increasing the font size until they are the size you want and then trace and transfer them - I'll post instructions of how to do this as it's useful for all sorts of projects.

It was next to her moses basket in our room and moved with her into her own room. She has just learnt to identify some letters and was very excited to see an "M" for mati hanging on her wall. I hadn't thought about it as a learning tool when I made it but I think it will be quite useful - already I can ask her if she can see an E for elephant and then ask her what colour it is once she says she can see it. It would have probably been better to have used lower case letters...may be another project there!